<< Back to Portfolio

In 2002, this was a brand new house with a brand new door assembly, and brand new tile installed in the main-entry area leading up to the door.

Apparently, the tile was one of the last items to be installed in this part of the house.

Measures that might have been taken to protect surrounding finished surfaces apparently were not considered as well.

And thus it was that some of the grout or mastic products somehow were dripped or splashed upon the nice shinny door sill assembly.

It was apparently determined by others that the high-gloss surface of the gold-dipped aluminum sill (not literally gold) could not be cleaned of such a gritty substance without leaving scratches.

So we were asked if there was anything we could do to solve the dilemma. To which we proposed the provision & installation of a real BRASS sill-cover installed over the original sill. Working once again with the fine folks at Schmeer Sheet Metal, using our specifications we were successful in getting the tile company off…

…the hook with the property owners. No doubt, “AFTER” owning up to the responsibility of paying our bill. But it was hundreds less than what it would have cost to replace the sill after removing the door assembly, after which it would need to be re-installed as well as dealing with all the other related ramifications.

Bull Mountain in Tigard. – We have this project shown in the “Glass Replacement” section of our portfolio as well, but because there was so much more that we did on these two doors, we decided to also include it in the Miscellaneous Repairs & Modifications section.

Our client had hired a handyman to tune-up the front doors in preparation for putting the house on the market.

If you enlarge the previous photo by clicking upon it, you will likely notice that only one of the two doors has the “Delta Frost” Obscure Glass shown above.

Breaking the obscure glass was the last mistake the handyman made before our client asked him to leave the premises. The photos above are showing some of the plugged holes through which our predecessor had inserted some lag-bolts in an attempt to reinforce the stile & rail components of these 8′ tall doors that had begun to pull themselves apart.

This is not an unusual procedure, but the photo above shows where one of the bolts began to bust out of the interior side of the top-rail on one of the doors. This is also something we repaired. Touching up the paint courtesy of Dan Rice’s (http://woodwindowstaining.com/)expertise, who also repainted the exteriors of the doors.

There were numerous other foibles, such as attempting to simply install a longer screw through the bottom flush-bolt without properly pre-drilling an adequate pilot-hole translating into cracking the door astragal.

Our technician Tim Afonin is shown piecing the exterior wood stop material back together in preparation…

…for installation of the new insulated glass unit…

…as demonstrated here by David Castro.

The doors were also trimmed, adjusted and re-weather-stripped for the best possible fit and operation possible, given the limitations of pre-existing conditions.

Southwest of the town of Willamette. Although formally known as West Linn.

A door and sidelight assembly in need of some tune-up services.

The threshold is looking its age. The wood sill is extremely weathered & the door no longer has any weather-stripping on the bottom.

The original sidelights consisted of single-pane glass, and only one of them had this after-market art-glass insert (partially shown above) because the other one had been broken.

So the plan was to upgrade the single-pane sidelight glass to insulated glass, which we did.

David Castro replaces the Z41 zinc weather-stripping hook on the bottom of the door…

…while technician Steve Hilt goes about the tedious, yet critical process of carefully masking off the various seams between the aluminum threshold, sill nosings & the wood jamb components.

This is the end result. Makes it look like someone knew what they were doing. If interested, you may want to click on the photo to enlarge it so you see caulking job.

What we installed was a Pemko 327D Sill Nosing, a 324D Sill Nosing and 145D interlocking aluminum threshold.

It is our opinion that the anodized-bronze color not only wears better than the mill-finish, but it also tends to compliment the tones of (for example) the brown-painted jamb assembly, as well as the stonework. It actually goes with just about anything.

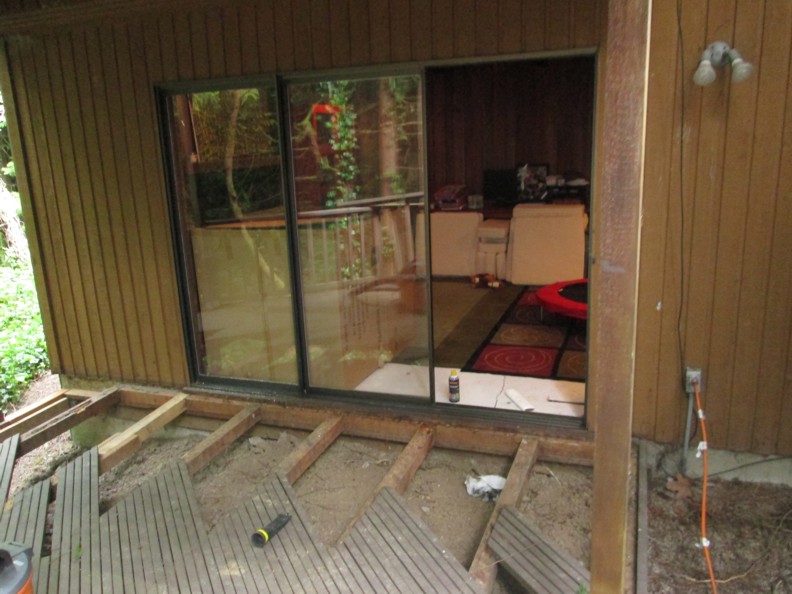
Almost all homes encounter a degree of settling. So those of us in the business of repairing the consequences of structural settling are never surprised by it. This home, which is located on a hillside about half way between the Raleigh Hills and the Sylvan Highland neighborhoods, is no exception, of course.

A daylight basement with a 3-panel aluminum sliding patio door assembly translates into considerable weight placed upon the support studs beneath the ends of the header support beam spanning that wide door opening.

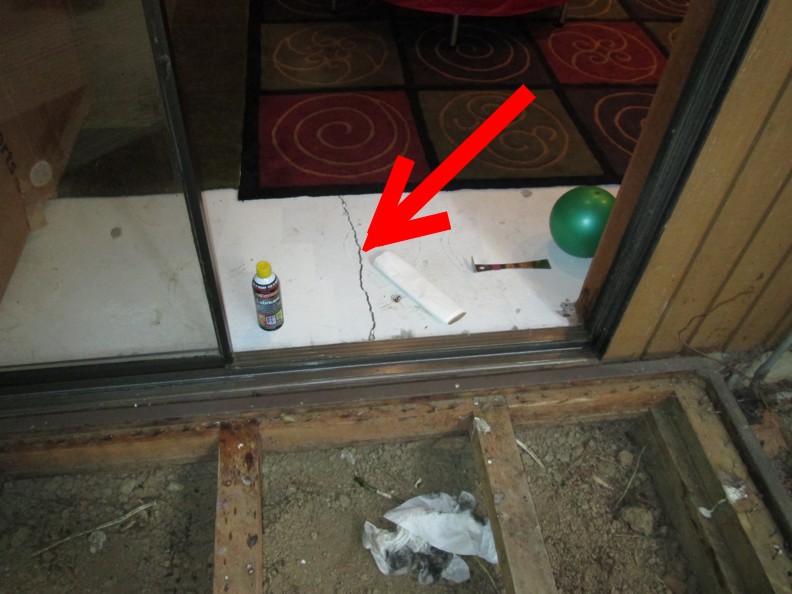
This weight and the consequential pressures may or may not explain the forces brought to bear that translated into the masonry floor cracking, creating a crown point in the floor and the aluminum door track that sits upon it, but it seems likely.

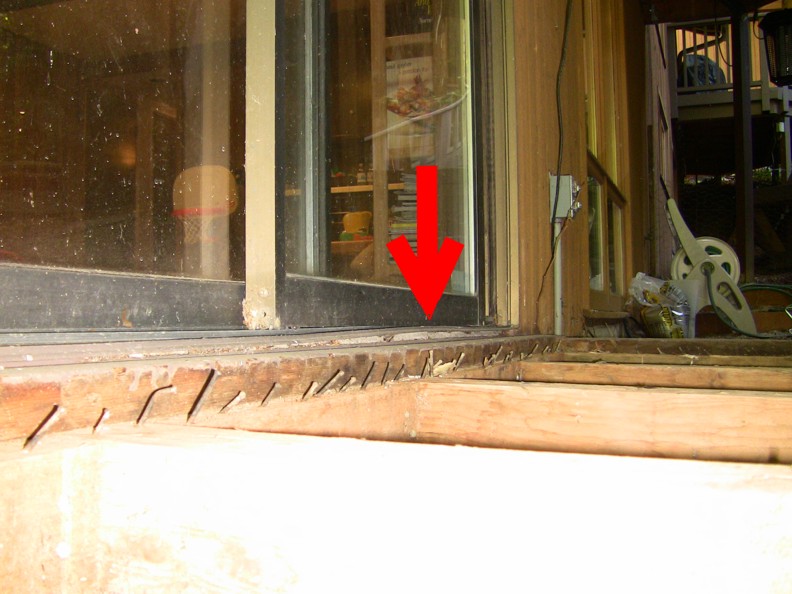
If you enlarge the photo above, you may be able to see the crown of the aluminum track assembly of which we speak. It looks like the floor has risen here, but it’s really a matter of the flanking floor surfaces falling that has created this effect.

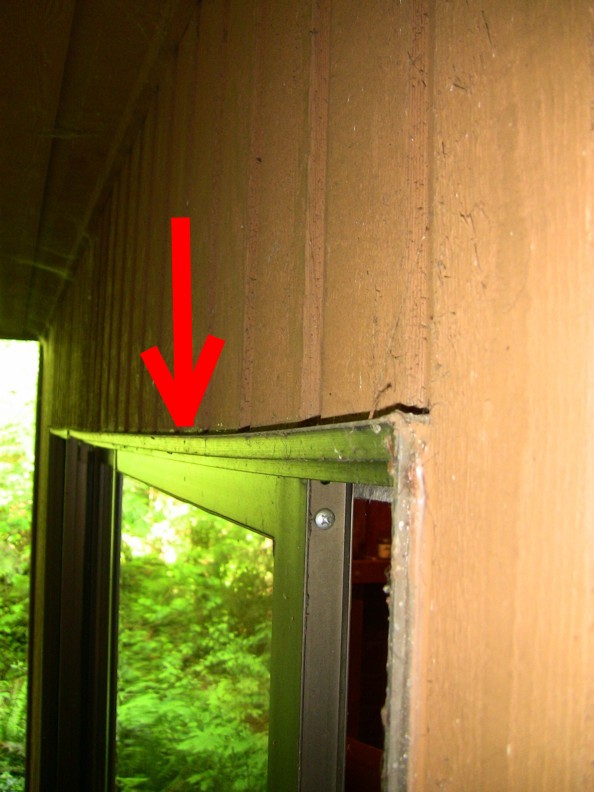
Add to this, the fact that these pressures have also caused the support beam in the wall to deflect down, as can be seen in the photo above. The combination of these factors has translated into the sliding door panel being sandwiched between the bottom track and the horizontal header track above, rendering the sliding door inoperable.

We had also proposed the option of removing the entire door assembly and modifying the rough-opening instead of this course of action. But of course, the cost was almost twice as much money.

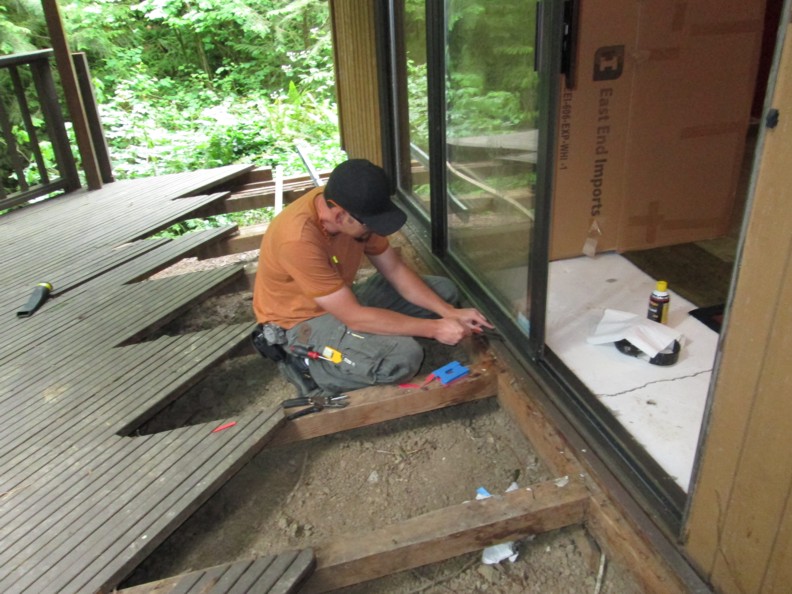
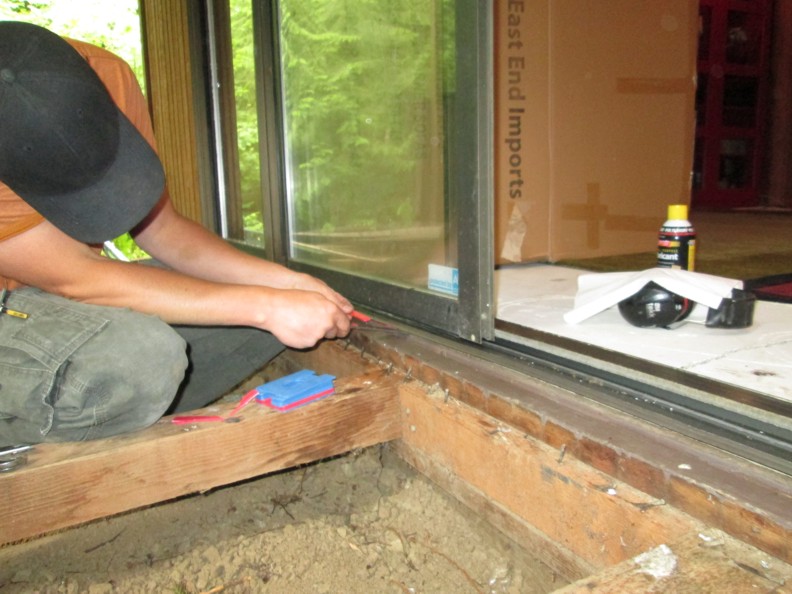
The photo above shows our field-tech Brandon shimming the track assembly so that the rise is more gradual and less abrupt.

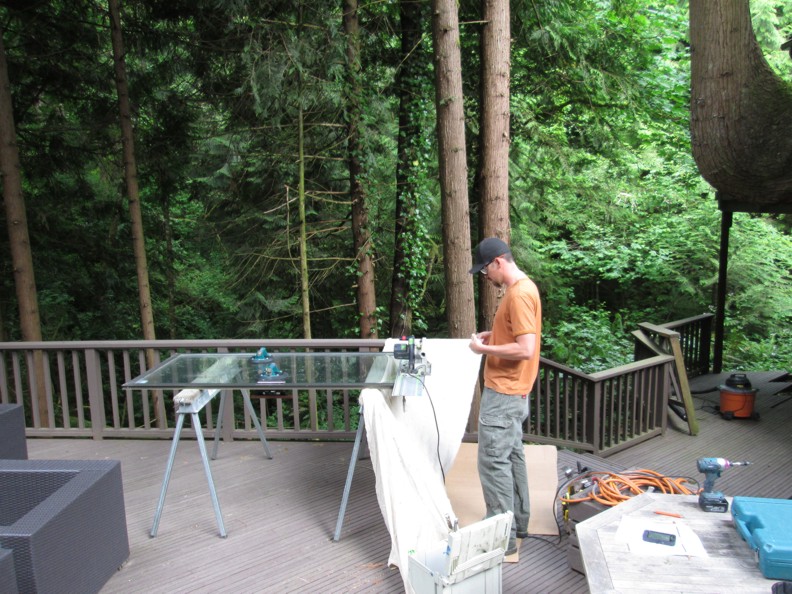
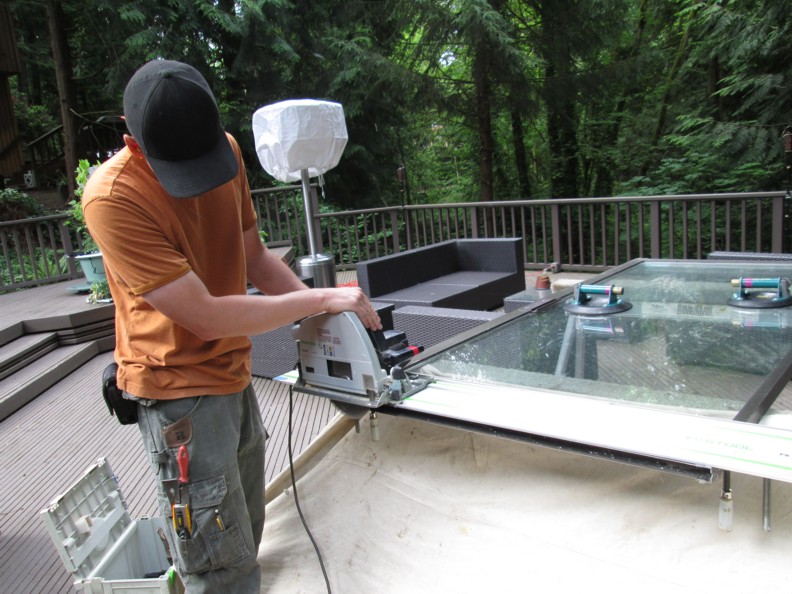
Step two of our proposed remedy was to cut the height of the aluminum door. Yep, just like a wood door.

Very doable, when you know what you’re doing. And when you have the correct tools.

Not really better than new, but it will likely suffice for many more years of trouble-free use. Just another example of the problem-solving resources which decades of experience have afforded us. You might think we’re making this up…but we’ve had clients almost cry when they find out that we are not there to try and talk them into buying a new door or a bunch of new windows.