<< Back to Portfolio

Another home owner reporting water showing up around their windows.

Remember the farm houses with large wrap-around porches… Besides lacking character or any architectural appeal, the back of this house has so very little protection from the elements.

Note what appears to be an attempt to stem the flood of water penetration by means of installing some sort of aluminum overhead drip over the top of the window.

Yes, those are mushrooms growing out from under the exterior window trim.

In any regard, whether architecturally appealing or not…even with the extreme exposure and the pressboard sheathing, if the flashing products were simply installed correctly…

…none of this damage would be occurring.

And the ironic part is that of all the relatively technical or skillful aspects required to…

…build a home, installing flashing products correctly is really one of the most simplistic. Anybody can make a mistake, but the kind of errors that…

…lead to the entire back side of a house needing substantial repair like this are nothing short of gross neglect and a failure to employ even a modicum of quality control.

One of the many well-appointed homes in one of the many well-appointed neighborhoods up upon and around Bull Mountain.

As you can see, the day I showed up to perform the preliminary inspection, it was a bit foggy. The previous shot was the day we did the job.

Lots of potential points of entry, such as the wooden horizontal band, the exterior trim, not to mention the nearby adjoining roofline.

This is where the evidence of moisture intrusion is showing up on the interior side.

I’m not certain you can make out the swollen portions on this small photo, so I’ve included some arrows in hopes of helping illustrate where the damage is.

MDF. Medium Density Fiberboard. Friend of the contractors bottom-line, but bane of the homeowner’s maintenance account.

Well there’s a potential point of entry if ever I saw one. Imagine water running down off over the top of the board near the opening, and then add strong gusts of wind accelerated as the moving…

…air-mass is forced up over the mountain.
You can then imagine it running down on the top of the bottom horizontal board till it finds the low point of least resistance into the wall.

But we needn’t worry, Inspector Castro is on the scene with his CSI forensic tool-bag of experience to find and stop the culprit. And yes, we do always replace the water damaged interior surrounds and trim materials, including the drywall if and…

…when needed and if and when it is desired by our clients that we do so. And we do have some reputable painters we are willing to refer if desired. And sometimes, when so desired, we will sub-out the painters so our clients only have to deal with one contractor.

I like these types of duplexes. I like the dissimilarities and the creativeness that the dissimilarities require.

However, our client doesn’t particularly like the water that is showing up at the top of her ground-floor window.

The tell-tale signs of water getting in the wall above, as seen from the interior top of the vinyl window where the drywall surrounds it.

Up at the 2nd story window above it, we remove the bottom exterior trim board, and what do you know…the flashing membrane is overlapping that which is above.

Not only that…but for some reason, the bottom nailing-fin has been cut extremely short. I’m not certain you can make that out with these relatively small photos, but I’m not certain I’ve ever seen that.

With this photo, you should be able to make out how the water followed the metal strap down to the horizontal seam in the pressboard…

…sheathing, and then migrating to the right along that seam before continuing its journey down to the top of the lower window.

There were also large lapses in the laying of the felt moisture-barrier, including places where there simply was none. So the decision…

…was made with our client to remove all the siding up to the top of the upper window, the damaged sheathing was replaced, new moisture…

…barrier installed and then the new Hardiplank siding was installed as needed. Hardiplank siding almost always breaks when removed.

Linns Mill area on Mompano Reservoir in Clackamas County.

There’s nothing quite like paying a handyman thousands of dollars to make a leak worse than what it was before he did the work. Water is “still” showing up at the top of the lower windows.

Please note the metal flashing sitting on top of the felt moisture-barrier that is coming down from above.

When the wood trim is taken off, we discover the felt paper behind the trim sitting atop the felt-paper coming down from above. Are we seeing a pattern here?

We take the exterior trim boards off at the bottom of the 2nd story windows and we find the moisture-barrier sitting over the top of the window assembly nailing-fins coming down from above.

Not too much mystery surrounding exactly how the water is getting into this wall. At least he was consistent, was he not?

Unfortunately, the water damage has translated into the need for some structural component repairs near the bottom of the wall.

After which the process of the wall being buttoned back up is begun.

Our premier technicians Bruce Hinkenlooper & Tim Afonin (behind the camera) zeroing in on putting our client’s concerns to rest.

The finished product. Time to call a painter. Buyer beware the Handyman services selling their price.

On a hill in Happy Valley. The initial evidence of a leak can at first seem almost innocuous. A little water dripping from the top of…

…a window on the interior. Perhaps the window needs a little caulking on the exterior to plug a hole?

MDF window surround material can end up looking like this even if you just overwater a plant on your window sill. It’s like cardboard. No need to panic.

A little more than a little investigation translates into the need to begin removing stone, as we discover water damaged sheathing behind the stone facade.

Alright, now it’s O.K. to panic. We’re almost having to rebuild the exterior wall in its entirety. Hard to believe the leaking could go on for so long before it showed up on the interior.

All the way up to the roof. As with almost all the projects in our little portfolio here attest to, the cause of this almost catastrophic damage is quite simply a lack of quality-control when applying proper flashing technique to these exterior walls.

We go about replacing the 2nd story exterior envelope components while letting the mastic cure a bit before replacing the stone work on the ground floor. And no…the original stone is not reused.

…back together.
We don’t have room for the photos to show it, but we also did some work on the protruding wall on the opposite side of the deck, up around the 2nd story windows, and there is more to be done here…but limited funds have…

…put the kibosh on any further repairs, for the time being anyway.
Once again…literally better than brand new!

The Raleigh Hills area. The backside of this house really gets hammered by the sun and the prevalent incoming weather systems out of the southwest.

Almost every window assembly had some degree of water-damage.

Mostly jamb assembly issues, of which the exterior brick moulding is a part. And the exterior window sills are almost always the first component to show damage.

But what began as a wood window repair project quickly translated into some exterior wall repairs as we traced down where the water funneling through those holes in the sills was ending up.

This necessitated that we remove several courses of siding beneath a number of the window assemblies. And of course cedar lap-siding almost always breaks when removed, so it was replaced.

Here’s an example of some of the type of water damage we encountered from some of the water getting through those damaged window sills.

If you enlarge the above photo by clicking on it, you may be able to better make out the progression of steps taken to repair the exterior wall below these windows.

One more piece of siding to be installed around the exterior electrical outlet.

There were also several very exposed dormer-windows at the far end, above the garage. Repairing these necessitated temporary removal so that we could disassemble and reassemble with much more reasonable access to the various window components.

Necessity being the mother of invention has necessitated that we become quite adept at setting up ad-hoc temporary shops. It’s nice when the weather cooperates with this process such as with this project. But ultimately, if there isn’t a garage, carport or covered porch, we can bring out and set up various types of coverings when the weather isn’t so accommodating.

The Crestwood Neighborhood in Southwest Portland near Multnomah Village. I didn’t have opportunity…

…to inspect this wall or take any “before” photos that illustrated how our client came to believe they had…

…water penetration issues. Our technicians Steve Hilt and David Castro, along with my staff, handled all that.

But it was determined that the wall should have all the siding removed, any damaged sheathing replaced, new…

…moisture-barrier installed and new siding installed.

For all the problems and costs which improper application of the moisture-barrier and flashing create, it seems necessary that we stress the fact that proper application is really an elemental proposition.

As they say, …it isn’t rocket science.? Many of these projects have shown windows with the moisture-barrier covering the “bottom-nailing fin.” Well here is what it looks…

…like when it’s done properly. If you look closely, you can see the vinyl fin on the bottom of the window lying “over” the top of the flashing membrane and the moisture-barrier.

And Steve is (previous photo) holding up the moisture-barrier at the top of the window to further illustrate this most basic of principals…”that which is above must overlap that which is below.”

David Castro demonstrates the fine art of juggling long pieces of Hardiplank siding while balancing upon a narrow aluminum plank without tripping over his safety rope and getting hurt.

The Mount Scott – Arleta area of Southeast Portland.

Calling this window opening a wee bit unusual may be considered an understatement by some, but we think someone deserves…

…credit for a creative attempt to highlight the shower stall with a daylight opening that still met the need for privacy. If they had composite trim…

…materials back when this was installed, and if maybe the siding had been something other than vinyl or if the opening had more protection from the elements, it just might have worked.

But as you can see, what our client was hoping would be a relatively painless replacement of some exterior trim quickly unraveled into her bank-accounts worst nightmare. To really appreciate the devastation, you might click the photo to enlarge it.

Even the structural-supports beneath the tub needed to be replaced. Fortunately, we were able to achieve this short of having to pull the tub. Bruce Hinkenlooper readies the new wall stud structure for installation.

The wall is assembled with a new Vinyl window installed to our client’s specifications. Working with our client to try and keep the costs minimized, we re-used what original Vinyl siding we could…

…along with some extra pieces she had on hand, and finished out the top of the exterior wall with our own attempt at creative problem solving. Obviously, this wouldn’t have been our first choice.

And we realize some contractors would have refused to even do a project like this if the funds were not available to make their work look like the creme de la creme of projects, and we think we know what that’s all about.

However, we try our best to avoid looking down our noses at folks of limited means, since in truth…that describes each and every one of us. It’s all relative, is it not? Our technician Tim Afonin puts on the finishing touches by installing some vinyl corner-trim around the new interior window opening.

The Conquistador on S.E. Belmont Street in Portland.

There is water showing up at the top of the lower windows. So holes are cut in the drywall in the ceiling to trace back the water trail.

And upstairs, more holes are cut below those windows to confirm the suspicion that the 2nd story windows are the point of entry by which the…

…water infiltration is accessing the tops of the ground-floor windows. And indeed, confirmed it was.

No siding to remove here. The solution is actually fairly simple on this one. Provide & install “Sill-Pans” below the top-floor windows to reroute the water back out to the exterior if the sealant fails.

So the first Vinyl Window is removed from the masonry rough-opening.

Conan goes about cleaning the excess sealants from both the windows and the rough-openings…

…while Tim Afonin goes about field-fabricating several aluminum sill-pans.

Another mystery solved and another problem resolved.

A very nice home up on a hill high above Newberg with a million dollar view of the coast range from which the dominant jet stream brings in most of the severe storms off of the southwestern pacific ocean.

This poor house had so many issues related to poor design and poor products that my space here will only allow me a mere smidgen of the photos and repairs that we ended up being contracted to make.

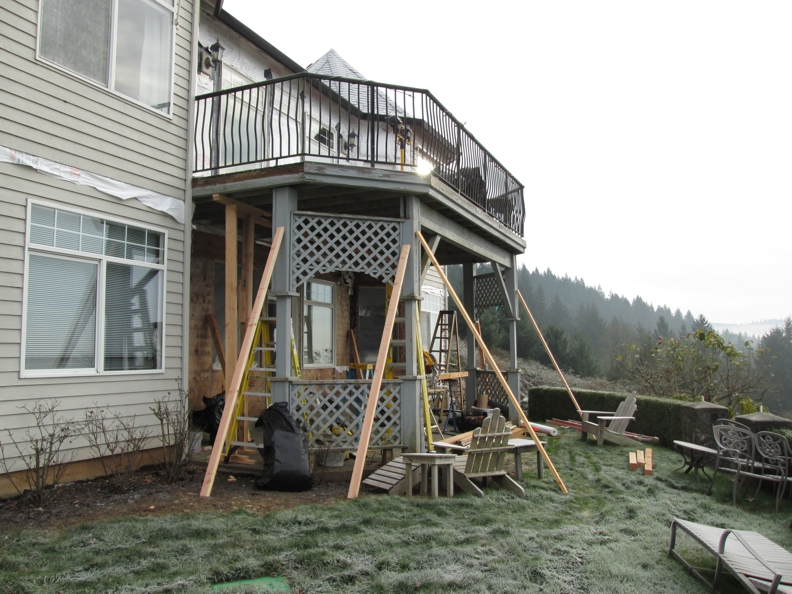
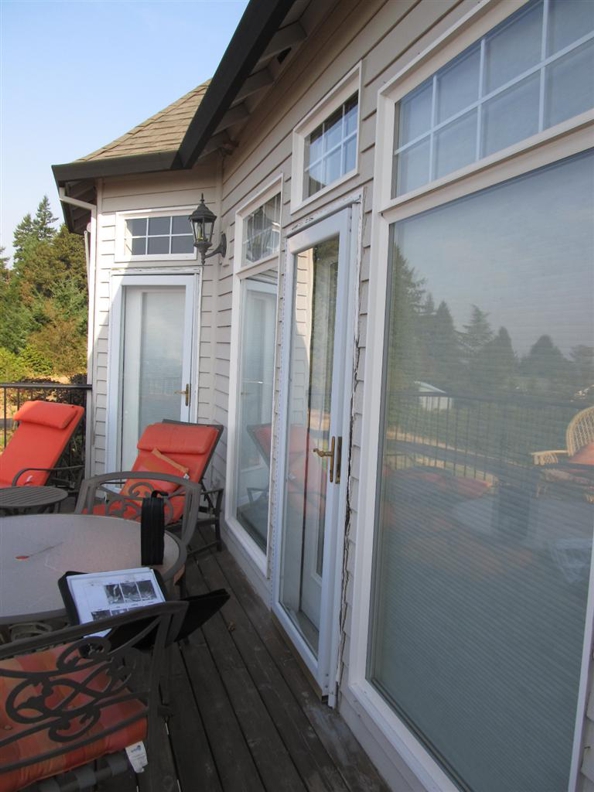
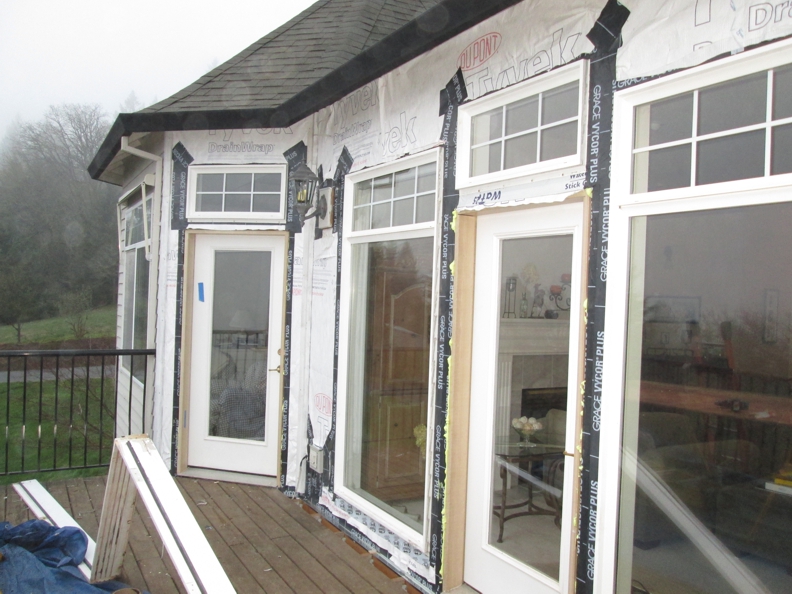
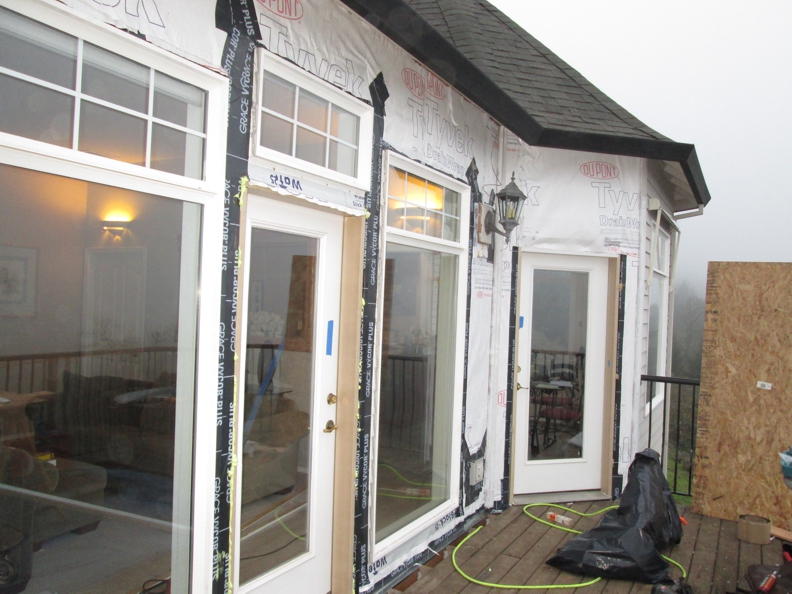
This is obviously up on the southwestern facing deck with 3 of the five exterior door assemblies with very serious substandard materials and weather related issues. You can only see two of three deck doors in this photo.

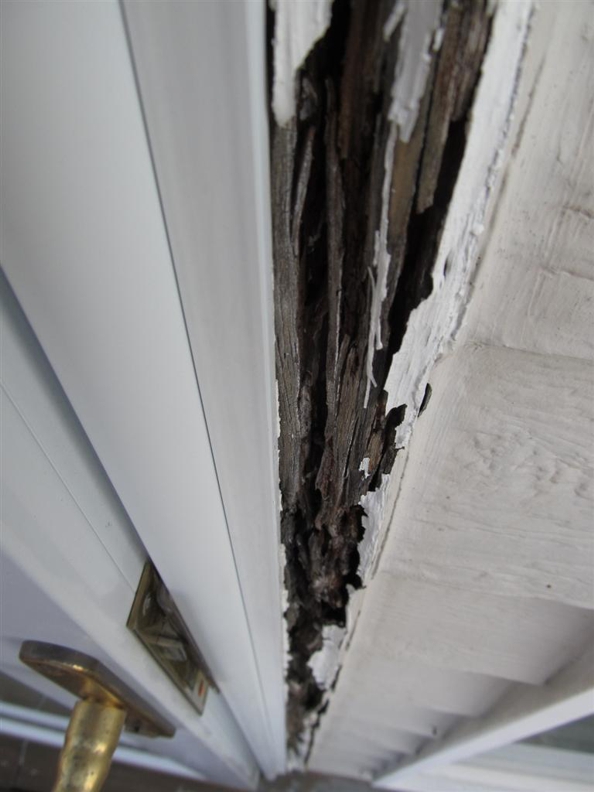
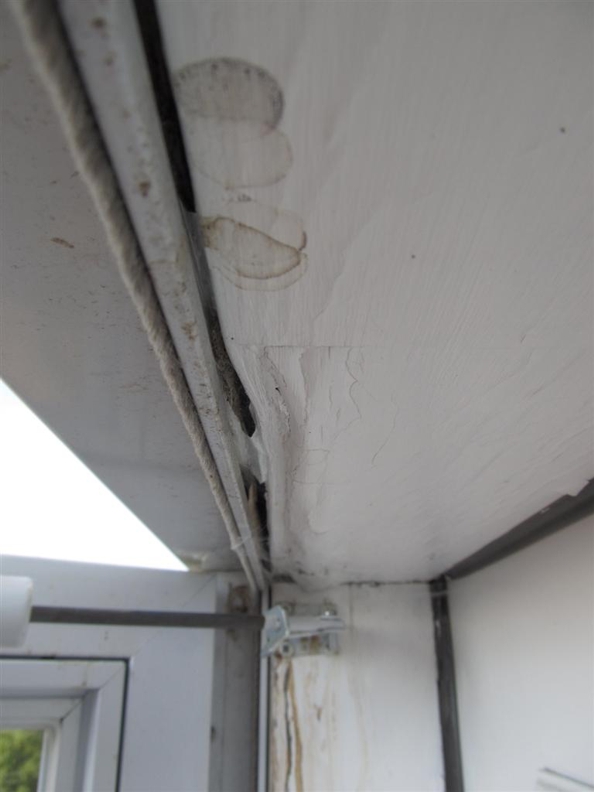
All three of the deck doors had storm doors on them, and yet all the exterior brick molding around the doors looked like this. Absolutely disintegrated. Simply funneling the water on through to the jamb assemblies.

When I began going over this project with some of my crew, I prefaced it by saying that I had never seen rotten brickmoulding so severely obliterated, and several of them rolled their eyes at me because we see it all.

But of course nobody had seen anything quite this extreme. It looked as though perhaps the brickmould was not only finger-jointed material (which is a sin), but that maybe it was left with only the factory prime-coat, which isn’t really a real prime-coat.

Our initial proposal involved replacing the jambs and exterior trim around five exterior single-entry fiberglass doors, reusing the original doors and then rehanging the storm doors. But of course, once the jambs were removed, there was damage…

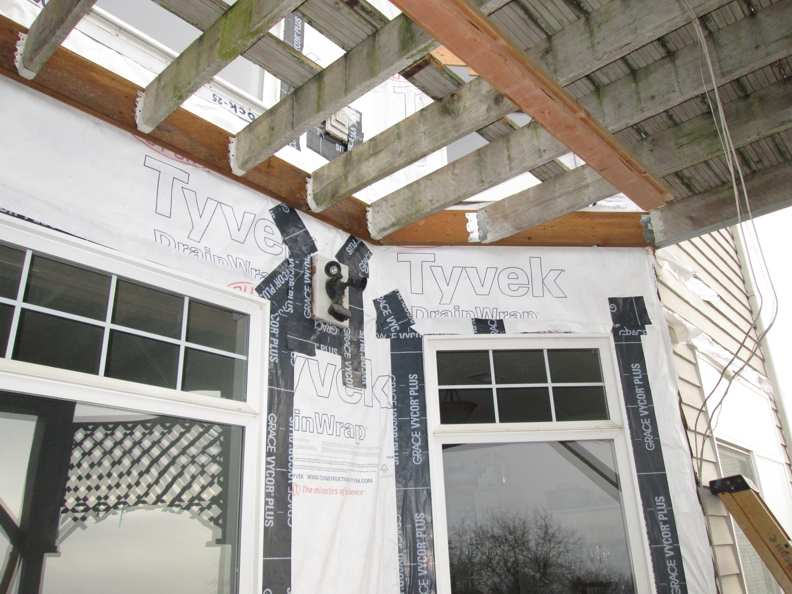
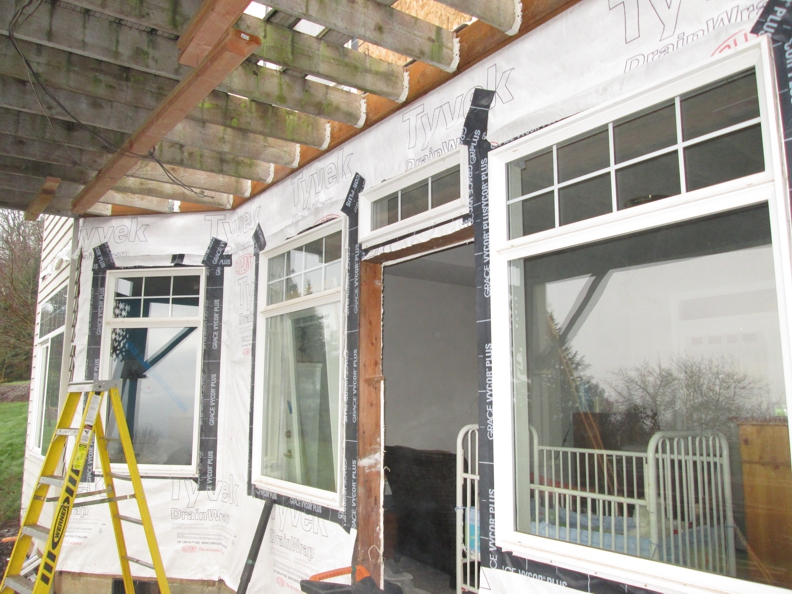
…in the walls discovered and the scope of work was transformed to substantial rebuilding of the exterior walls on this side of the house, both above and below this deck. As some of the photos reflect, we had to detach the deck from the house to some degree to…

…affect the repairs properly. I haven’t mentioned yet that the siding was LP siding which should help explain some of the issues our poor client was saddled with.
Above we see beneath the deck, the fourth of the five doors with rotten jambs. I don’t have room here to show you the fifth one.

But please note our ability to rehang original-doors into new jambs. Or new doors into original jambs. The point being that our technicians are real door and window mechanics. Not merely your run-of-the-mill handymen. And whether you know it or not…there are many qualities inherent in our services that exist because of those problem solving skills, no matter what we get hired to do.