|
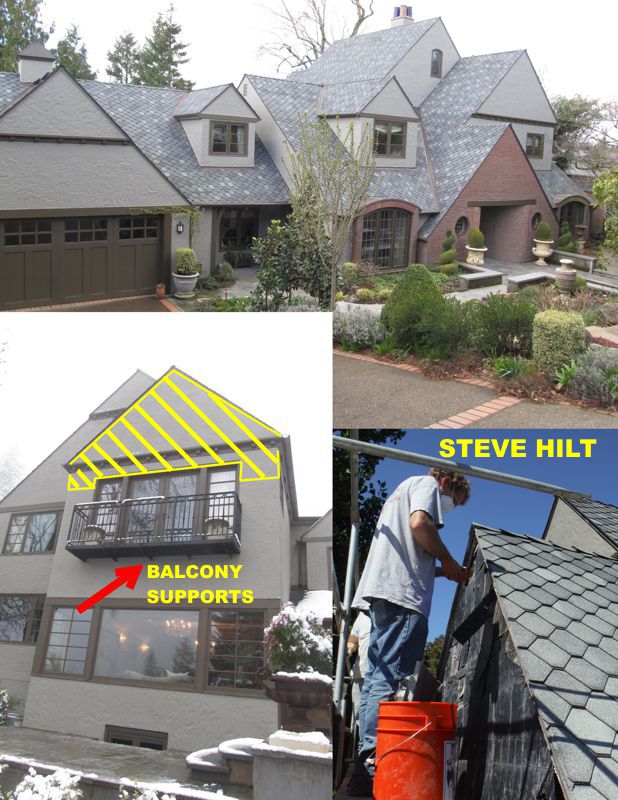
In 2013, we were hired to find the leak that was showing up at the top of living room windows, as well as the top of the door assembly above it (See project 27115 in this same category). Operating on the assumption that the water source might be one in the same, we removed all the stucco shown above in the area highlighted in yellow, and as documented in the photo shown above with Steve Hilt up at the top of the scaffolding. This removal of stucco siding confirmed that due to improperly flashed stucco and related components, substantial water had indeed been finding its way down inside the exterior wall to the top of the doors and we assumed, on down to the window assembly below.
|
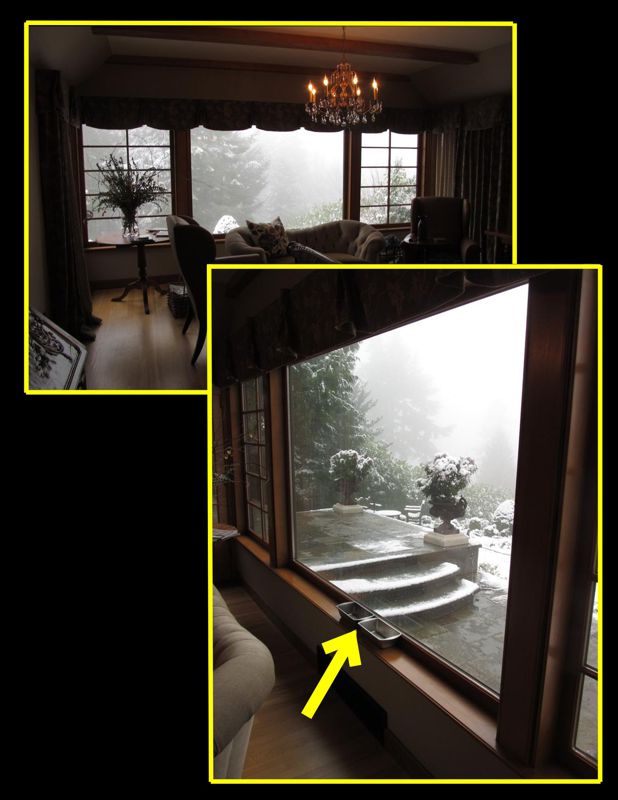
Also operating under the direction of our clients who were understandably wanting to minimize costs, it was assumed and hoped that stopping the water at the top of the doors would also stop the water showing up at the top of the windows below. But the following year (2014), as the photos above indicate with the cooking pans on the living room window sill again (yellow arrow), this was not to be. So let it be known that there is often more than one source and entry point for leaky walls. And finding all the points of entry is not always an exact science unless a client is willing to pay us to open enough exterior surfaces to find them all. And yet obviously, folks are understandably motivated to minimize costs.
|

It’s also not unusual for the stress related to unexpected financial liabilities such as this to translate into folks being tempted to blame us for not finding and stopping all the leaks the first time. That was not the case here. Our clients chose to remember that we were instructed to try and minimize costs. These folks were among those who choose to treat others as they would want to be treated. And so the stucco below the Juliet balcony is removed and the water-trail is followed both up and down the wall. Eric is showing someone’s previous repairs as indicated by the shiplap sheathing having been replaced by plywood. You may need to click on several of these photos to enlarge them so you can make out what we’re trying to show here.
|
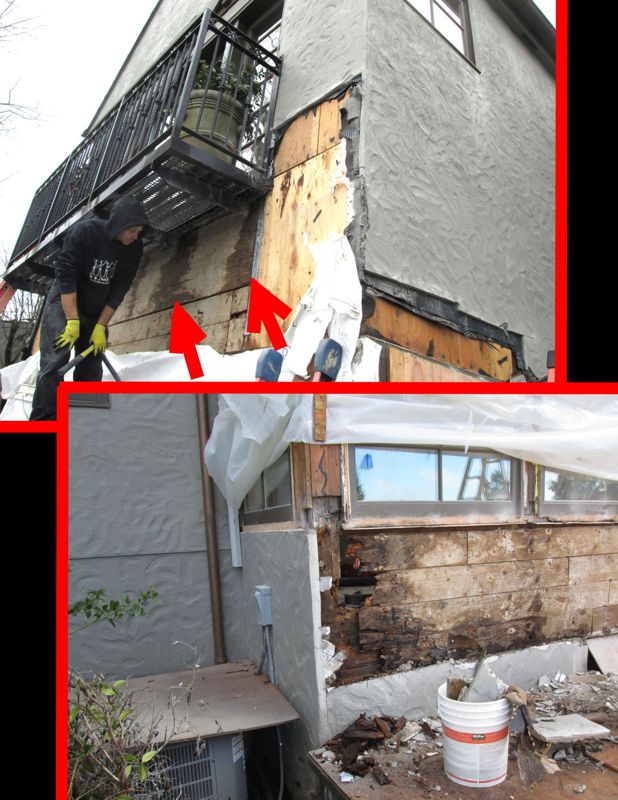
What we found to be the primary culprit were the cantilevered steel flat-bar supports for the Juliet balcony. They can be better seen in photo set #7 below, but you should be able to see the water-stains on the sheathing just below the balcony (red arrows). And below that (2nd photo), the water trail led us down below the living room windows where an entire corner support post had completely disintegrated.
|

Our client seemed keenly appreciative of the fact that this structural damage was discovered before the weight of the steel balcony structure resulted in bringing the master bedroom down into the living room. .
|
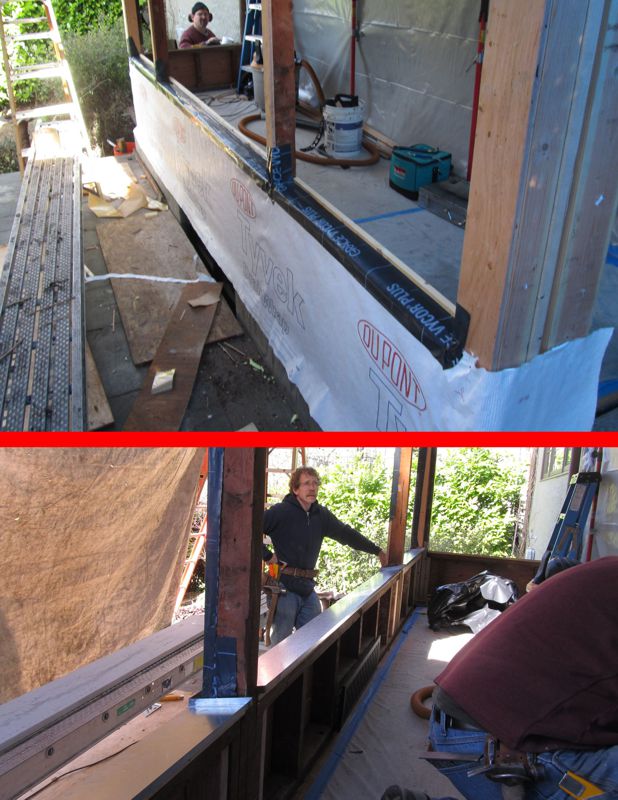
Damaged structural components are replaced and properly covered with moisture-barrier products. A custom galvanized sill-pan is manufactured for us to our specifications by Schmeer Sheet Metal and installed by our crew before the windows are reinstalled.
|
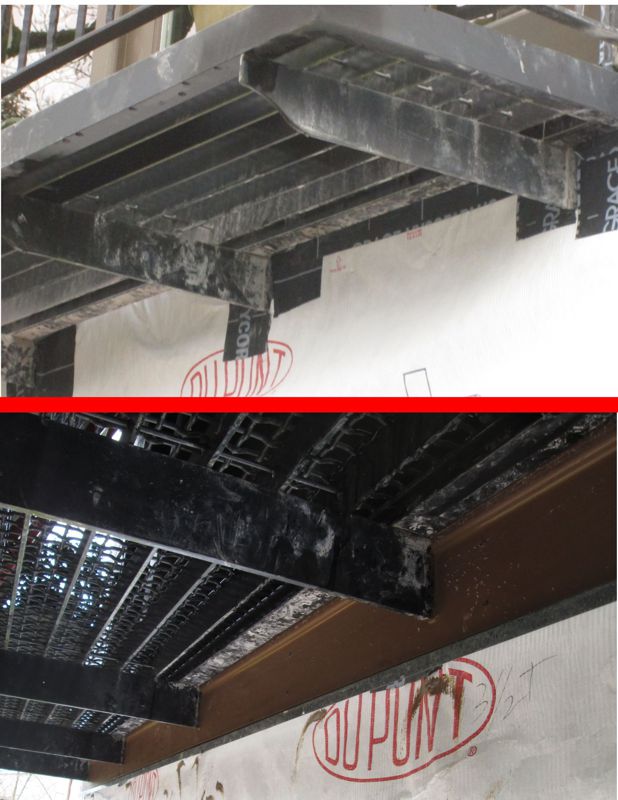
Here you can better see the steel flat-bar supports tied into the master bedroom flooring joists. Flashing these to the stucco siding in a way that was viable and durable seemed like a long-shot to us. So we devised a plan to have some very custom flashing made to cover the area above the supports, which was also tied into and under the door assembly sill-pan. We then enveloped the supports with composite material that was laid over more sheet-metal flashing tucked beneath the flashing above it and then turned out at 90 degrees at the bottom of the composite boards to cover the top of the new stucco siding that was yet to be installed below it all. Did you get all that?
|
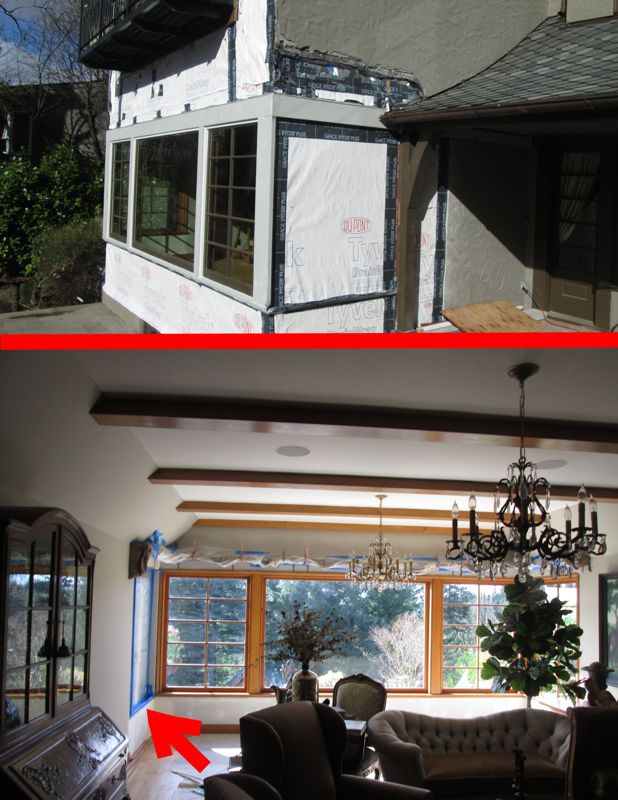
Here we see the wall rebuilt with the new moisture-barrier in place on the exterior, and the windows and related trim reinstalled on the interior.
In photo-set #5 above, you can see a door assembly that was original to the house there off the living room. Our client said that this door was never used. So we were asked to replace it with a window that would match the one on the opposite end of this structural bump-out. These photos show the new window opening temporarily covered while we waited for the new window sash to be manufactured by Marvin. Yes, only the jambs and trim were original. The sash had all been upgraded previously to modern Marvin windows with insulated (double-pane) glass.
|
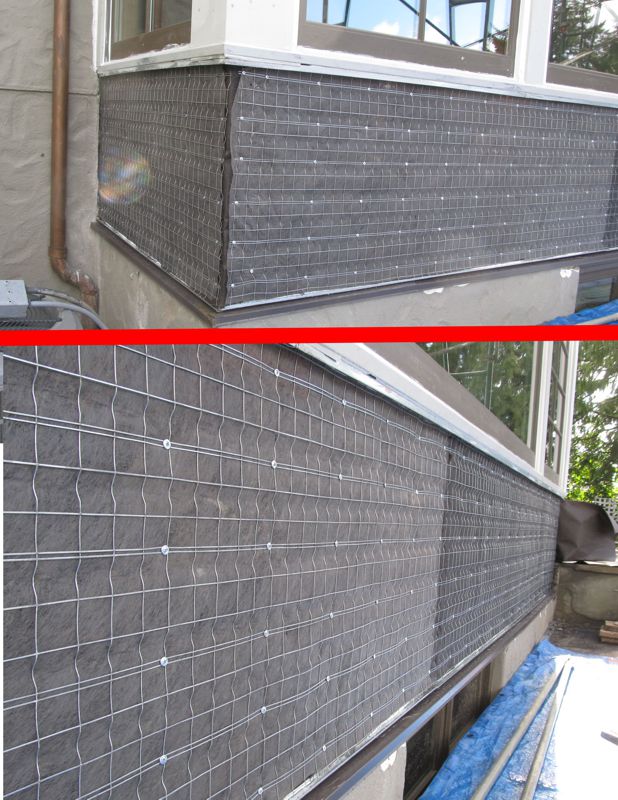
Here we see the exterior walls prepared for the reapplication of stucco siding.
|