<< Back to Portfolio

A potential client contacts us via e-mail with a photo of some of his existing windows, to give us an idea of what kind he has.

He also sends some photos of several of his wood-clad Pozzi sash he has removed himself.

Along with photos showing the primary problem at hand.

Water damage, A.K.A. Rot.
A.K.A. dry-rot,…but that is a misnomer. 99% of what most folks call dry-rot is actually wet-rot. Real dry-rot is not associated with rain directly. Thus the term “DRY-rot.”

But of course we don’t go around correcting everyone who calls it dry-rot because it would take too much time, and most folks don’t particularly appreciate being corrected. So anyway, we threw some pricing at our client and he delivered his wood windows to our warehouse/shop in Tigard.

Whereupon Mr. Jared Anderson takes it upon himself to mill some new sash components…

…and then piece them together with some of the reusable original sash components.

Note the new bottom-rail…

…interlocked here with one of the original vertical-stile components.

Jared throws in a couple pin-nails for good measure.

Close to the Sellwood district.

Another crop of weather damaged wood windows

Frankly, this house is old enough to merit a rotten window sash or jamb or two.

What’s mind boggling is when a house that is only 6 or 8 years old has rotten windows already.

In the Pacific Northwest here, the dominant species of wood window is Fir. Most pre 70’s original wood sash were built from Fir trees.

For years I assumed that this was probably a practice across the continental United States. However, I found out from a lumber broker who sold lumber to a number of…

…window manufactures, that back east where Pine is the dominant wood species in the forested areas, most windows have been manufactured of Pine for generations.

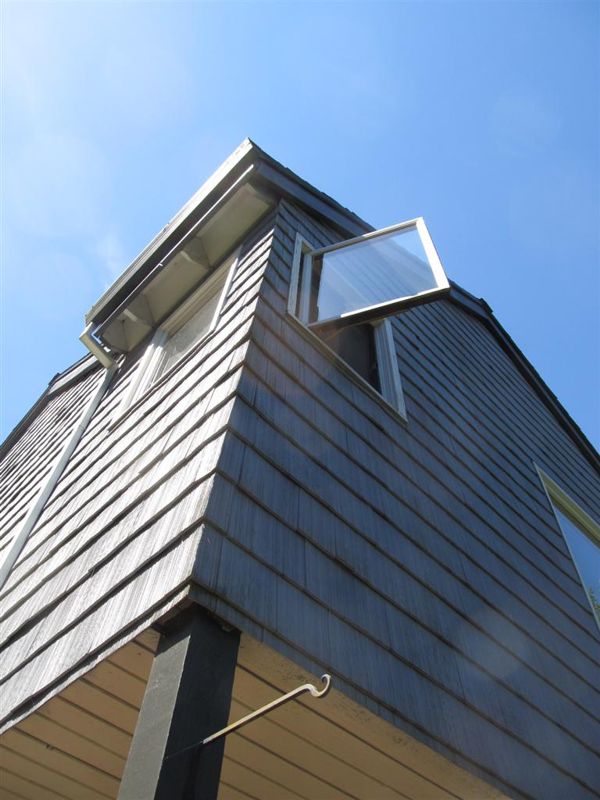
One of the many homes up in the west hills that sit on stilts.

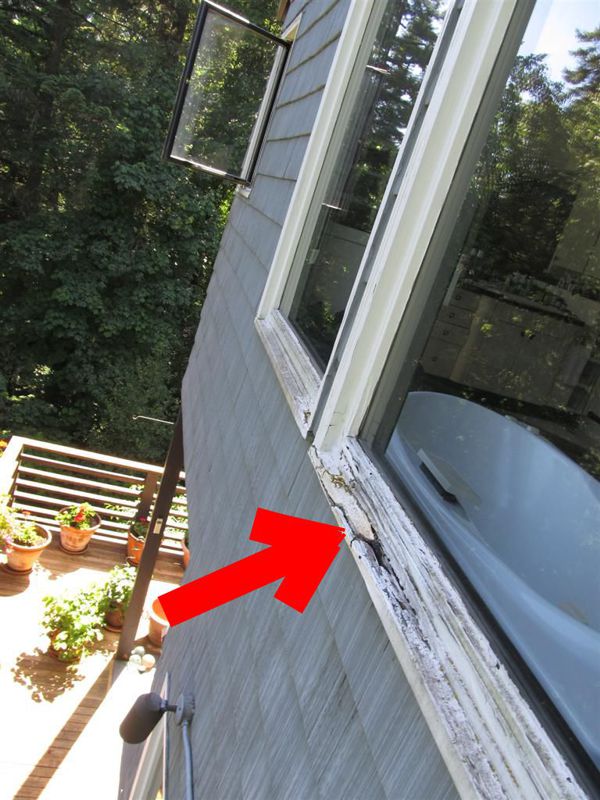
On the back deck, we find the side of the house that takes the brunt of the weather, and the original Pozzi Windows that have been endured that brunt. In the insert, just above the finger, can be seen a previous window-sill repair. Some sort of exterior spackle was apparently used.

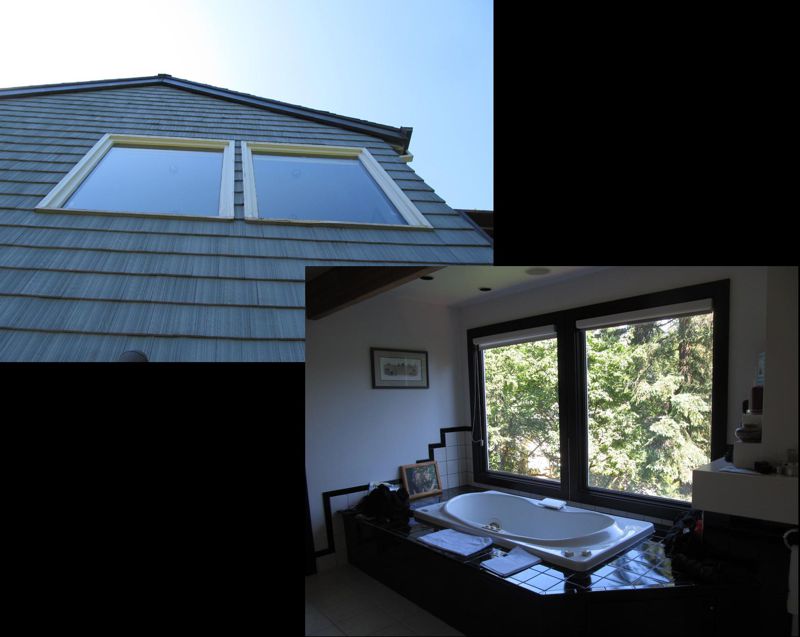
Up above that window assembly, we have more casement windows in need of repair. Shown here, we have two large picture windows that sit over the tub in the master bathroom. If you enlarge the photo by clicking on it, you will likely be able to make things out a little better.

This is the only damage showing on this window assembly, as could be discerned during our cursory inspection…a damaged window sill.

This project encompassed considerably more water-damaged window repair (and some door repair) than that which is documented here in these photos, such as the casement window shown above.

But the master bathroom picture windows serve to illustrate how difficult it can be to discern the full extent of the damage that’s existing…

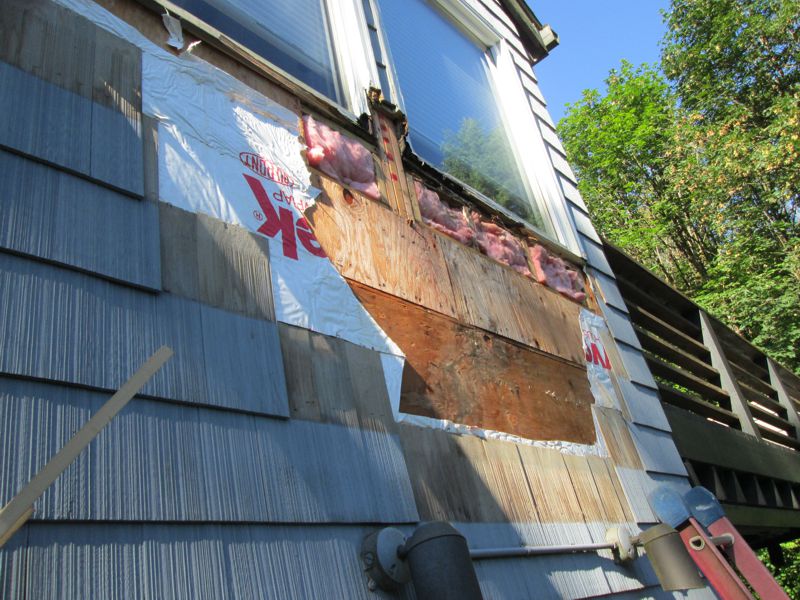
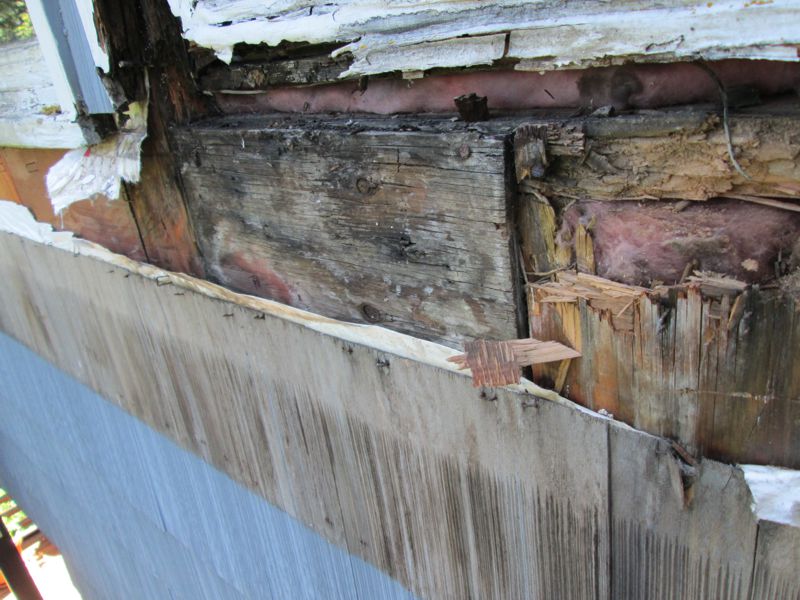
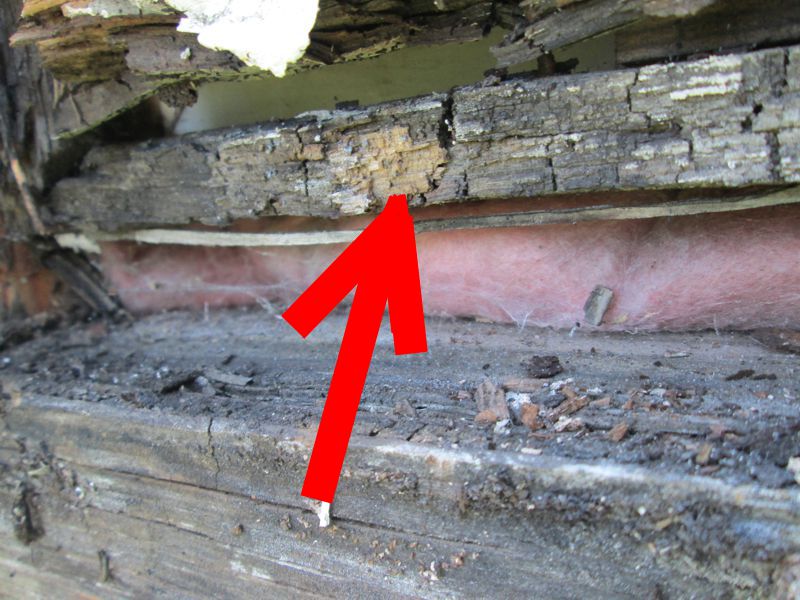
…until such time as we’re allowed some investigative labor to disassemble some of the wall components. Once the rotten sill was removed, we discovered damaged sheathing below that was covered by the cedar siding.

Once the sheathing was removed, it was discovered that the plate (2X6 Stud) that sits beneath the window sill was also pretty much toast.

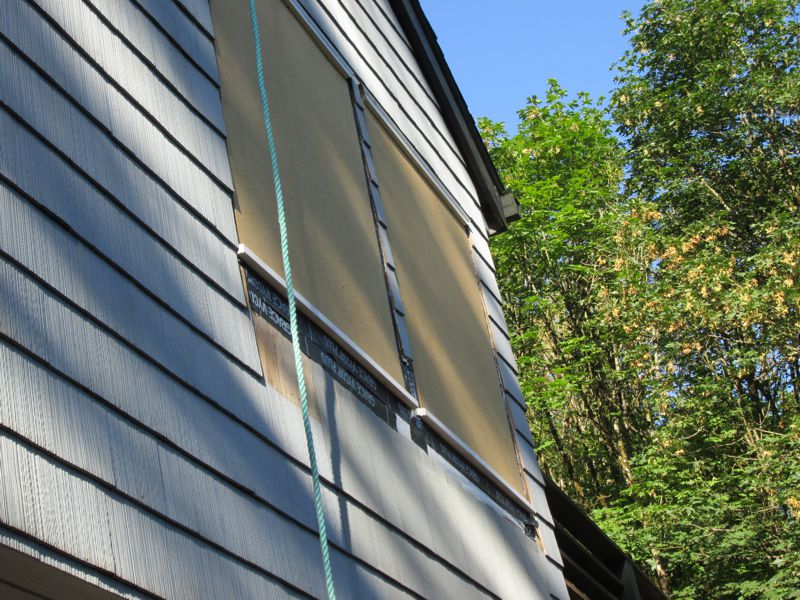
Repairs are made, the sills are replaced, the wall is buttoned back up, the siding replaced, and the openings are covered for the night until the following day.

Repairs are made to the jambs, the overlapping Pozzi stop-material that the glass will be glazed to and the exterior trim is replaced. Soon, the glass will be re-installed as well.

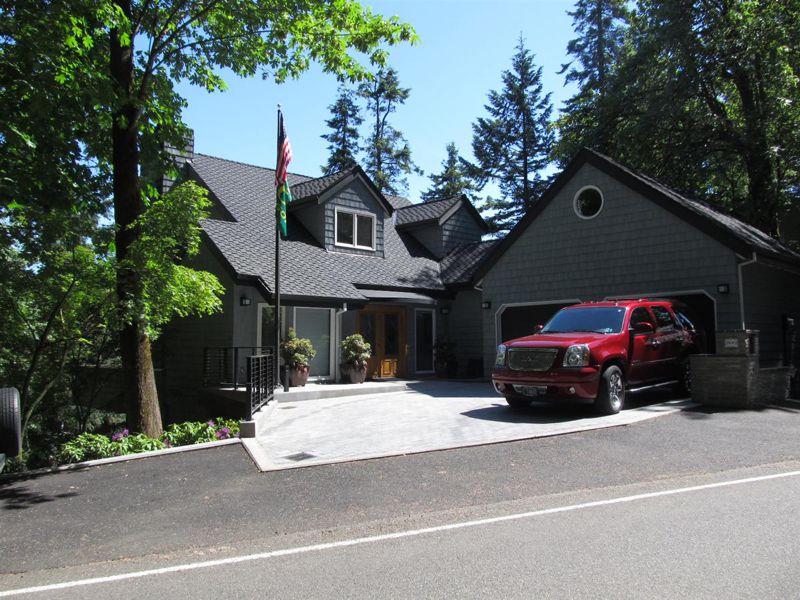
A modest home with a finished daylight basement around back, located in the West Slope area of S.W. Portland A.K.A. Beaverton.

This is only one of the water-damaged related wood window projects we worked on for these folks, but it will be our featured project for the purposes of our portfolio here.

A bay window structure out the back off of the master bedroom.

Apparently, painters have been slathering on spackle, and who knows what else for years. Although now, the evidence of the water damage has begun to creep in all the way from the exterior, and can no longer be so easily ignored.

If you enlarge the photo by clicking on it, you may be able to make out the telltale signs of a severely damaged bottom sash-rail just above our inspectors hand.

The perfect metaphor for corruption…we see here someone’s industrious attempts to white-wash what has been festering internally for years now.

Our technicians make short work of the investigative aspect of the work to find that the jambs and sills are pretty much toast on this assembly.

Change-Orders are generated to cover the additional work, and we see here that the sills have been replaced with new material.

New sash are being constructed on-site as needed.

The finished product.

The Laurelhurst neighborhood in N.E. Portland. Two large direct-glazed picture windows with one of them obstructed by shrubs in this photo.

And although both openings are candidates for upgrading the glass from single-pane to double-pane, this particular opening…

…also has water leak issues, as evidenced by the interior wrinkled MDF panels below.

This is no doubt due to the water-damaged window sill and related components directly above that area on the exterior.

The day for the work arrives, and it takes 4 or 5 of our technicians to load up the two new 9’9″ X 5′ insulated glass units onto one of our vans.

The pony wall beneath the dining room window is opened to check the extent of water damage, while our client trims back the Rhododendron-shrub so we can access the opening from the exterior while we perform the glass & sill replacement work.

Damaged components and the insulation are replaced…

…and the wall is buttoned back up.

The new insulated Low-E Glass units are carefully installed. The dining room pony wall is restored to its former glory, awaiting a final paint-job.

The living room picture window was also upgraded.

The historic Drake House that carries the distinction of being the first home in Portland to have electric heat.

Remodeled by Neil Kelly in 2003 for one of the descendants of the original Drake family.

We were employed by Neil Kelly to take care of the doors and the windows.

We installed a new Marvin Window Assembly in the kitchen window that had been water damaged and replaced with a single pane piece of glass years ago. That portion of this project is featured in the “wood window installation” portion of this portfolio, if you’re interested.

Jesse Cartarelli is busy replacing the sash cords for these original wood double-hung windows.

If you’re wondering why the first photo shows the house and roofing to be a different color than the rest of the photos, it’s because that is actually an “after-shot.”

But it was such a nice shot of the house (I think), that I couldn’t resist using it as my “first impression” photo.
Nate Valazuez showing his disarming charm for the photo op.

Joseph Minden displaying his skewed view of things from the window he’s running through our 10-step diagnostic tune-up system after replacing the muffler bearings.

We also hung & weatherstripped several sets of back facing double-entry doors & one single-entry exterior door on this house, which is featured in the “door-installation” portion of our portfolio under the same project number.

The Riverdale area in Southwest Portland near Lewis & Clark College.

The back side of this one of many very prominent homes in this neighborhood is not surprisingly showing the consequences of having wood windows in such an exposure.

So we had new custom sash manufactured and went about repairing and replacing the jambs and the rough-opening components as needed.

We erected scaffold & tarped-off what was ostensibly the master-bedroom to keep the elements at bay.

Fortunately, as I recall, these folks had other digs in various places around the world to go live in while the heavy construction ensued.

Master Jared no doubt pondering the complexities of bearing the burdens related to having such properties and possessions to care for and maintain?or maybe he was just thinking it was about time for lunch.

Once the sash are removed, the secret life of the fungus and the consequential damage becomes more and more evident.

More of the same.

Rubin Sanders putting the finishing touches on the newly installed replacement jamb assemblies.

The new casement sash are installed and painted. Better than new.

Up in the west hills, not far from Burlingame Fred Meyer.

Marvin Non-Clad Sliding Wood Windows.

Yeah, that view is facing pretty much due West,…

…from which most of the wind-driven moist weather comes.

So you know these windows are inundated every year.

The dark paint doesn’t help either. When the paint gets hot from the sun, the wood gets hot. Components expand, seams open-up…

…letting water in…which in turn, causes more swelling…seams open-up even more.

The cycle accelerates until you’re looking at something like this.

Fortunately, our master woodworker guy, Tony Geitz had the remedy for that treacherous cancer.

Tony showing off his handiwork back at our warehouse before we returned and reinstalled the repaired sash for our client.

A solar passive house with a Beavercreek address, although it’s southeast of Massinger Corner & Falls View.

Still fairly new. The first time we visited this home to inspect these windows, the glass was not yet in the solarium structure.

Around the back of the house, the Marvin Wood Clad Windows were apparently the…

…unintended recipients of some sort of masonry overspray. If you enlarge the photo, you might be able to make out what we’re talking about.

Since we were being employed by the construction company who did the work…

…we didn’t inquire about exactly how it happened, or even whether or not it…

…related to the stucco, or the concrete portions of the structure.

We were simply the minions employed to measure-up, order the new window sash & install them.

Of course, ours is not to pry into the missteps of our clients, but rather to concentrate upon…

…that which aids us in avoiding our own missteps. Technically, this an installation rather than a repair…although a window problem was corrected and components were replaced.

Lake Oswego, just south of the PCC Sylvania Campus.

The left side of this house, which is also the south facing side of the house bears the brunt of the weather. And as you can see, the architecture provides very little protection for our client’s wood-sash windows.

If you enlarge some of these photos, you may be able to make out telltale signs of water-damaged wood window components.

Obviously, some are more obvious than others.

While some components may only look like the paint has lost its adhesion to the wood, those of us who inspect wood windows for a living can usually tell that the “wrinkles” in the paint mean that the wood has shrunk due to rot.

As so frequently happens with this type of work, what was initially approached as an exterior trim and sill component repair project has translated into “change-order” work. The removal of certain components has exposed further damage that was previously covered, such as the edge of the jamb-leg (shown above) that had been covered by the brick-moulding.

This photo shows that the removal of the water-damaged “sub-sill” exposed the “main-sill” and more jamb-leg damage, necessitating the temporary removal of the double-hung sash.

Fortunately, on this project, the weather has turned quite accommodating for work that involves opening up exterior walls.

This shot, somewhat obscured by the shadows, shows one of our technicians installing replacement materials for the window-jamb.

And just before we replace the exterior brick-moulding trim as this day nears its end, the exposed sheathing surfaces are coated with a self-adhesive flashing-membrane that we have tied into the exterior walls moisture-barrier. The particular product that we have used here is called Grace Vycor Plus.